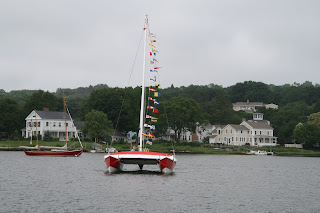
Sunday, December 14, 2008

Ice Box and Anchor Locker, Bow Roller

This is probably the last post concerning the ice box. The good news is that it works very well and has met our expectations. We put two bags of ice cubes in for the delivery to the Saint Petersburg boat show and ten days later their was still ice. Here is the exterior hatch with it's latch.

This is the insulation plug for the hatch. This ice box has 5" of insulation all around it. When you insert this hatch plug it settles down into the hole slowly as the air squeezes by. Nice fit.

With the plug removed the shelf is visible below the hatch.


The wooden square with the handle is the interior access to the main ice box. It also has 5" of insulation on it and slopes downward into the box to minimize cold leakage. Also visible in this photo is the propane burner and the galley sink. Not visible here is the foot pump below the shelf below the icebox access.

Adjacent to the galley side companionway is this cooler in the cockpit. While it only has 2" of insulation it too worked very well and is very convenient.

Here is the trap door to the box which hangs below the forward deck to store the anchor rode.
I
The box handily holds 20' of 5/16" chain and 150' of 7/16" anchor line.

Here is a view of the box from underneath and forward. Also in the fore ground is the roller for the Rocna anchor .

We have completed the outboard window change out and the results are good. More light is allowed into the cabin and there is a more open felling. This is the interior view.

Here's a fairly close view of the window from the outside. You can also clearly see the dead eyes and chainplates with terminators and the shroud lashings. The sliding hatch for the companionway is also very clear.


A port side view of Abaco showing the window and also the bimini. The bimini was built for us by High Seas Fabrication of Stuart FL. They did a real great job for us. The bimini provides lots of shade, standing headroom and as an extra bonus good hand holds at crucial locations. We did however forget to put a window in to be able to see the mast head and mainsail leech. We will have to have this added.

This picture was taken right before the bimini installation and shows the starboard side view .

Monday, November 10, 2008

More Ice Box and Anchor Roller

All that's left to complete the new window installations is to repaint the house sides.

You may recall how many times this custom ice box has appeared in this blog. Well here it is again. This photo is looking down from the deck and shows the cleats we have installed to hold the shelf where the blocks of ice will sit and also the cleats that will hold the top plug.

Here is the top plug and the shelf. The plug is 4 1/2" of foam covered with 4 oz xynole polyester cloth ans epoxy and is ready for final fairing and paint. The ice shelf and the cleats that support it have epoxy inserts in way of the attaching screws to prevent water access to the wood and still permit removal for cleaning and maintenance.
The next two photos show the plug and the shelf in primer. The plug fit very snugly, tight enough that it settles slowly while air eases out.There is an arrow carved into the top of the plug to indicate proper orientation. The holes in the shelf are to permit free air flow.

We have outfitted this boat with a 22 lb (10kg) Rocna anchor. This anchor has a reputation for setting and resetting quickly and being able to handle changes of direction in pull. But it did need a special roller built to hold it ready for deployment. Below is the roller almost ready for primer.

This box will be bolted up under a trap door hatch in the teak foredeck. It will hold the primary
anchor chain and line.

Sunday, November 2, 2008

Lots of Fit Out Details

We got back from the Wooden Boat Show in Mystic and unloaded and parked the boat. We had a large teak deck to template, fabricate and install on a large yacht in san francisco that required all hands for the better part of three months. This wsn't all bad because if we had put Abaco in the water we would have bought into a whole lot of stress due to the fact that several hurricanes had south Florida in their sights this year. While none of them ended up coming here, we still would have had to deal with the threat. If you wait until you know for sure you're going to get swatted, then it's too late to take any action.
But we are back in the groove again and have lots of things to complete on our Tiki 30.The rudder lashings were not shapedjust right and needed some reworking of the aft edge of the stern pos and fwd edge of the rudder.Then a layer of six oz cloth to seal every thing up tight and some new paint.
The photo below shows 1/2 of a pvc tube glassed onto the bottom of the cockpit as a conduit for the battery cables and fuel hose. We originaly installed this tube in the cockpit, butit turned out to be a toe stubber and prevented water from draining out of the strbd side of the cockpit. Seems obvious in retrospect.

This tube is to provide a condyuit for the wiring tha passes between the strbd hull and the port hull. It wasn't something we thought about until it was time to actually run that wiring and realized that there really wasn't any appropriate location where the wiring would be out of the way and secure.
We also moved the spinnaker halyard inside the mast. It seemed a shame to have the aerodynamicaly clean wingsail rig and then have both parts of the spinnaker halyard just dragging in the breeze. This will get one part in the mast and also position it properly to use one of the halyard stoppers at the base of the mast.
One of the first comments on the boat at Mystic was that our outboard portlights were too small.This thought was expressed by many others who have seen the boat in person and online.I really didn't get it until I saw the boat from a distance, and then had to agree.

Here we have removed the port light

Below you can see the new window frame on the port house side.

Once the shape was finalized we cut out the lexan and rabbeted it into the back side of the frame. Due to the high expansion factor of the lexan, we attached the lexan to the plywood frame with 3M 5200.
Here we have glued the frame with the lexan to the house side, also with 5200. The little wooden blocks are attached to the boat with super glue and then small wedges push the frame against the house side. Once the 5200 sets up (a couple of days) we will fillet in the frames and add a layer of fabric to seal it off. Then some fairing and we will repaint the house sides.
We used 12 mm Dyneex for the headstay bridle. Also visible here is the lower end of the jib on the Harken roller furling unit.
When we first went to hoist the mainsail, it was a no go. We followed the plan and used a double block for the upper end of the halyards, being careful to run them in opposing directions. What happened was that the block layed over on its side and the throat halyard wore a groove in the block cheek and jammed up tight. Perhaps if you pulled upboth halyard sat exactly the right time it might work. But we changed the double block out for two singles and the gaff and mainsail went up as smooth as silk.
We are now preparing to take this boat to the St. Petersburg, FL "Strictly Sail" boatshow in early December. We are having a custom rigid tube bimini fabricated By High Seas Fabrication in Stuart FL. They are a custom shop that does great work. They are building the top and will install it next week when we launch. We are also having trampolines made for the aft end of the boat on either side of the boarding ladder. The tramps are being made by John MacNally of Gulfstram Sailmakers of Jupiter FL. We are closing in.

Friday, October 24, 2008

Wharram Names Boatsmith As U.S. Professional Builder

The primary reason we went to the Wooden Boat Show in Mystic, Ct was to meet James Wharram and Hanneke Boone and to show them the quality of our workmanship on our Tiki 30. Before James Wharram Designs will authorize a professional builder, they want to meet the builder and ensure the quality of his workmanship. I'm happy to announce that our meeting went extremely well and Boatsmith, Inc. is now officially the authorized U.S. professional builder for James Wharram Designs. For more details, click on the link to the announcement article on the Wharram website. http://wharram.eu//live//article.php?story=20080816102936984


Friday, July 4, 2008

Mystic Wooden Boat Show - 2008

Our Tiki 30 was launched last week in Mystic, Connecticut, just in time for the Mystic Wooden Boat show. The following photos show how the completed boat looks in the water. We are exceptionally pleased with how everything came together and couldn't be happier with the boat.


Best of all, we were able to meet the designers: James Wharram and Hanneke Boone and show them our first completed Wharram catamaran. Click on the photos for a larger view to see the details.


Below: A crowd gathers in the cockpit at the boat show, while the designers, James Wharram and Hanneke Boon are hanging out with us on one of their many visits over the weekend.


Below, left to right: David Halladay (myself), James Wharram, and Hanneke Boone enjoying a pleasant visit in the spacious cockpit of our Tiki 30.

Thursday, June 26, 2008

Final Details and Ready for the Road

The photos below were all taken Tuesday as we scrambled to finish all those last minute details to get the boat ready to take to the Wooden Boat Show in Mystic, Connecticut. The first photo below was taken Tuesday night as we are loaded on the trailer and ready for the road. We left the shop at 10:30 PM. We will be assembling and launching the boat at a yard near the boat show today, on Thursday, June 26 - just a little over 5 months since starting the construction in late January.

Here is a view of the cockpit showing the custom-made seat cushions and other details such as the cockpit table/motor box, hatches, etc.

A close-up of the motor box shows the teak table top and the central jib sheet winch, as well as instrumentation and engine controls.

Here is a view into the galley in the port hull. The sink is on the outboard side to the right, and our custom-made stainless single burner propane stove is mounted on the shelf to the inboard side. In the center is an opening portlight above the access to the ice box.

Here you can see the finished nav-station in the starboard hull. A VHF and stereo have been installed, along with the DC circuit panel and 12-volt fan and lighting. All the varnished trim is teak.

Here is a view of one of the rudders showing the lashings. The V-shaped notch in the top of the stern post is a receiver for the extra aft netting beam.

We will probably have the boat in the water before most of you read this. We hope to meet some of you this weekend at the boat show.

Tuesday, June 24, 2008

Fitting Out Details

We're in the final assembly and fitting out phase of the Tiki 30, and have been working long hours in a final push to get everything done in time to make the Mystic Wooden Boat Show this weekend, in Mystic, Connecticut. The boat will be loaded onto a trailer later today and we will begin the trip north to arrive in time to assemble and launch at a nearby boatyard. There are lots of projects going on simultaneously as we complete such tasks as rigging, wiring and systems and hardware installations. The photos below were taken a few days ago, but will give you and idea of how things are coming together.

Here is a view into the cockpit, where you can see that the decks and non-skid areas have been painted, the motor box/table is finished with cut-outs for instruments and controls, and seat box lids and inboard portlights have been installed. We have since installed the engine and remote controls for it.

Here is a view of the port stern deck and aft portion of the cabin top. You can see the stern mooring cleat, inspection port, icebox hatch lid, and on the cabin top, the spinnker lead block and self-tailing winch for the port sheets.

Looking inside the port hull, forward into the bunk area, you can see that the portlights and cabin top opening hatch have all been installed, and the teak trim for the bulkhead openings is finished. The shelves are also getting small fiddle rails of varnished teak.

Here is the almost finished nav-station in the starboard hull. We have installed the DC switch panel, VHF radio, 12-volt L.E.D. lighting and 12-volt fan, and the portlight in the aft cabin bulkhead.

In addition to what is shown in these photos, we are completing the standing and running rigging and all the wiring within and between the hulls. Painting and varnishing is complete and most of the custom canvas items we ordered such as cockpit cushions and bunk cushions have arrived in time for the boat show. It's been an exciting and busy time in the Boatsmith shop. We'll post more photos as soon as possible of the completed boat, and we look forward to showing it in Connecticut, and to meeting the designer: James Wharram.

Tuesday, June 17, 2008

Topsides Painted, Outboard Mount Installed

The hull topsides have been sprayed with two coats of red Awlgrip, providing a nice contrast to the white Petit Vivid bottom paint and the decks and cabins, which will be painted with white Awlgrip.

Here is the forward deck, removed from the beams for finish sanding. We have lots of finishing details going on simultaneously as we are jamming seven days a week now to get the boat ready for the Mystic Wooden Boat show in Connecticut the last weekend of this month.

The outboard was delivered the other day. It is a Yamaha 8hp, 4-stroke with long shaft and electric start, and should be an ideal match for the Tiki 30.

With the outboard on hand, we were able to design and build the motor mount, and install it on the bottom of the cockpit sole. Below, you can see how the sides of the wedge-shaped mount were glass taped to the adjoining surfaces of the bottom of the cockpit.

In this side view of the motor mount, the glassed-in structure has been filleted and faired to the underside of the cockpit sole.

Here is a view of the motor mount from the cockpit. It is centered fore and aft to keep the prop in solid water between the hulls.

The foam-core cockpit sole had to be epoxy filled in the edges where we cut out the opening for the motor mount. In this view you can see the transom for the outboard clamp at the aft end of the wedge-shaped pod.

We have also built a covering box that encloses the outboard from the top and serves as a cockpit table as well as a place to mount such instruments as the steering compass.

Detail work is also going on down below in both hulls as we finish such things as edging all the shelves with teak fiddles and trimming the exposed bulkhead edges. Below you can see one of the main bulkheads with teak trim being formed for its edges. We are making these trim rings by gluing up layers of very thin teak that can take the radius. The clamps hold the layers until the glue sets, and then the rings are removed from the boat for finishing.

Here is one of the bulkhead trim rings, shaped and sanded and hung outside for varnishing.

The companionway hatches have also been varnished.